

Honeywell T9 Manual: A Comprehensive Guide
This manual details the Honeywell T9 thermostat, priced competitively with Nest and Ecobee, offering smart home integration and potential energy savings for users.
The Honeywell T9 thermostat represents a significant step forward in home comfort and energy management. Designed to seamlessly integrate into modern smart homes, the T9 offers advanced features like smart room sensing and geofencing. It aims to provide consistent temperatures throughout your home, optimizing for both comfort and efficiency.
Positioned as a competitor to popular models like the Nest Thermostat E and Ecobee 3 Lite – with a base price of $170 without the Smart Room Sensor – the T9 delivers a compelling blend of functionality and affordability. This guide will walk you through everything from unboxing to advanced settings.
What’s Included in the Box?
Upon opening your Honeywell T9 package, you’ll find several key components to get you started. The core of the system is, of course, the T9 Thermostat Unit itself, designed for easy wall mounting and intuitive operation. Accompanying this is the Smart Room Sensor, crucial for extending temperature control beyond the thermostat’s location.
You’ll also receive all necessary Mounting Hardware & Screws for a secure installation. Finally, a detailed Installation Guide is included, providing step-by-step instructions to ensure a smooth setup process, even for those unfamiliar with thermostat wiring.
Thermostat Unit
The Honeywell T9 Thermostat Unit serves as the central control hub for your home’s heating and cooling system. Its sleek design integrates seamlessly into most home decors, while the responsive touchscreen display provides a clear and user-friendly interface. This unit connects directly to your HVAC system, managing temperature based on your programmed schedules and sensor data.
The T9 boasts smart features like geofencing and remote control via the Honeywell Home app, enhancing convenience and energy efficiency. It’s priced around $170 when purchased without the Smart Room Sensor.

Smart Room Sensor
The Honeywell T9 Smart Room Sensor extends the thermostat’s capabilities by monitoring temperature and occupancy in remote areas of your home. This allows for more balanced heating and cooling, addressing hot or cold spots often missed by a centrally located thermostat. The sensor communicates wirelessly with the T9 unit, enabling “Focus Mode” to prioritize comfort in occupied rooms.
Strategically placed sensors optimize performance and contribute to potential energy savings, working in tandem with the main thermostat for a smarter home climate control system.
Mounting Hardware & Screws
The Honeywell T9 package includes all necessary hardware for a secure installation. This typically comprises a mounting baseplate, screws of varying sizes to accommodate different wall types, and potentially wall anchors for added stability. Ensuring a firm attachment of the thermostat base is crucial for proper operation and a clean aesthetic.
Carefully review the included instructions to select the appropriate screws and anchors for your specific wall construction, guaranteeing a lasting and reliable installation.
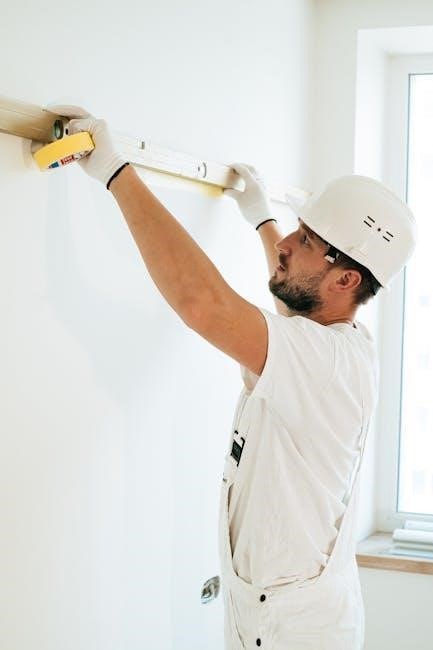
Installation Guide: Step-by-Step
Begin by safely shutting off power to your HVAC system at the breaker. Next, remove your existing thermostat, carefully labeling the wires. Use the provided wiring diagram to connect the T9’s wires, ensuring a secure fit. Mount the thermostat baseplate to the wall using the included hardware.

Attach the T9 thermostat unit to the base, then power the system back on and follow the on-screen prompts for initial setup and Wi-Fi connection.
Wiring the T9 Thermostat
Before wiring, completely disconnect power at the breaker! Identify your existing thermostat wires – common (C), heating (W), cooling (Y), and fan (G) are typical. Consult the Honeywell T9 wiring diagram, matching your wire colors to the corresponding terminals on the T9 baseplate.

Securely insert each wire into its designated terminal. Incorrect wiring can damage your system, so double-check all connections before proceeding. A ‘C’ wire is often required for power.
Mounting the Thermostat Base
After wiring, carefully mount the T9 thermostat base to the wall. Use the provided mounting screws and wall anchors if necessary, ensuring a secure and level installation. The baseplate should align with the pre-drilled holes from your previous thermostat.
Gently push any excess wire back into the wall cavity. Once the base is firmly attached, snap the T9 thermostat unit onto the baseplate. Verify a snug fit for a stable connection.

Connecting the Smart Room Sensor
To utilize the full potential of the T9, connect the Smart Room Sensor. After installing batteries (not included), the sensor automatically pairs with the thermostat during initial setup via the Honeywell Home app.
Proper sensor placement is crucial for accurate temperature readings in frequently used rooms. The sensor communicates wirelessly, extending comfort control beyond the thermostat’s location, optimizing heating and cooling efficiency throughout your home.
Understanding the T9 Thermostat Interface
The Honeywell T9 boasts a user-friendly interface designed for intuitive control. The display clearly presents current and set temperatures, alongside operational modes like heat, cool, and auto.
Navigating the menu is achieved through responsive button functions, allowing easy access to scheduling, settings, and system information. Familiar icons indicate Wi-Fi connectivity and system status, ensuring a seamless user experience for optimal home comfort management.
Display Overview & Icons
The T9’s display prominently showcases the current room temperature and the programmed setpoint. Operational modes – heat, cool, auto, and off – are clearly indicated with distinct icons. A Wi-Fi symbol confirms network connectivity, vital for remote control via the Honeywell Home app.
Additional icons signal system status, like fan operation or active schedules. These visual cues provide at-a-glance information, simplifying thermostat monitoring and ensuring efficient home climate control for enhanced user convenience.
Button Functions & Navigation
The Honeywell T9 utilizes a simplified button interface for intuitive control. A central dial allows for easy temperature adjustments, while dedicated buttons access menu options and scheduling features. Navigating the interface involves rotating the dial and pressing to select.

The menu structure is logically organized, providing access to settings like Wi-Fi configuration, system preferences, and advanced features. This straightforward design ensures users can quickly and efficiently manage their home’s climate settings.

Programming Your T9 Thermostat
The Honeywell T9 offers flexible programming options to optimize comfort and energy savings. Users can create custom schedules tailored to their daily routines, setting different temperatures for various times of the day. This ensures efficient heating and cooling, reducing energy consumption when the home is unoccupied.
Programming can be done directly on the thermostat or conveniently through the Honeywell Home app, providing remote access and control. Geofencing further enhances automation, adjusting temperatures based on your location.
Setting Up Schedules
Creating schedules on the Honeywell T9 is straightforward, either via the thermostat interface or the Honeywell Home app. Define distinct periods – Wake, Leave, Return, and Sleep – assigning desired temperatures to each. You can customize these periods for each day of the week, accommodating varied lifestyles.
The app allows for easy duplication of schedules, saving time and ensuring consistency. Prioritize comfort and energy efficiency by strategically programming temperature adjustments throughout the day.

Using Geofencing for Automatic Control
The Honeywell T9’s geofencing feature leverages your smartphone’s location for automated temperature control. Define a virtual perimeter around your home within the Honeywell Home app. When you leave this zone, the thermostat automatically switches to an energy-saving Away mode.
Upon returning, it reverts to your preferred comfort settings. This eliminates manual adjustments and optimizes energy usage, ensuring a comfortable home while minimizing wasted energy costs. Customize the geofence radius for precise control.
Smart Room Sensor Functionality
The Honeywell T9’s Smart Room Sensor extends comfort beyond the thermostat’s location. This sensor detects both temperature and occupancy in remote rooms, relaying data back to the T9 for balanced heating and cooling. It helps eliminate hot or cold spots, improving overall comfort throughout your home.
Utilizing “Focus Mode,” prioritize occupied rooms, directing heating or cooling where it’s needed most, further enhancing energy efficiency and personalized comfort levels.
Sensor Placement for Optimal Performance
For accurate readings, position the Smart Room Sensor approximately five feet off the floor in a central location within the room. Avoid direct sunlight, drafts from doors or windows, and proximity to heat-generating appliances like lamps or televisions.

Strategic placement ensures the sensor accurately detects the room’s temperature and occupancy, maximizing the effectiveness of the T9’s Focus Mode and overall comfort control. Proper positioning is key to realizing the sensor’s full potential.
Understanding Focus Mode
Focus Mode intelligently directs heating and cooling to the rooms currently occupied, utilizing data from the Smart Room Sensor. This feature prioritizes comfort where it’s needed most, reducing energy waste in unoccupied spaces.
The T9 learns your routines and automatically adjusts temperatures based on presence detection. You can also manually activate Focus Mode through the Honeywell Home app, ensuring optimal climate control and significant energy savings throughout your home.
Troubleshooting Common Issues
If your T9 thermostat fails to power on, verify the wiring connections and ensure a stable power supply to the system. For Wi-Fi connectivity problems, confirm your network credentials and router functionality.
Restarting both the thermostat and your router often resolves connection issues. If problems persist, consult the Honeywell Home app for detailed troubleshooting steps and support resources. A weak Wi-Fi signal can also cause intermittent connectivity.
Thermostat Not Powering On
If the Honeywell T9 thermostat doesn’t power on, first check the circuit breaker to ensure it hasn’t tripped. Carefully inspect all wiring connections at the thermostat base and furnace control board, verifying secure placement.
Confirm the ‘C-wire’ (common wire) is correctly connected, as this is crucial for consistent power. If a C-wire isn’t present, a C-wire adapter might be necessary. A faulty transformer could also prevent power; professional assistance may be required.
Connectivity Problems (Wi-Fi)
If your Honeywell T9 thermostat experiences Wi-Fi connectivity issues, begin by verifying your home network is functioning correctly with other devices. Ensure the thermostat is within range of your router; walls and interference can weaken the signal.
Double-check the Wi-Fi password entered during setup. Restarting both the thermostat and your router can often resolve temporary glitches. If problems persist, consult the Honeywell Home app for troubleshooting steps or contact support.
Honeywell Home App Integration
The Honeywell Home app is central to controlling your T9 thermostat remotely, offering a user-friendly interface for scheduling, monitoring, and adjusting settings. Through the app, you can view current temperatures, change modes (heat, cool, auto), and access energy usage reports.
The app facilitates geofencing setup for automatic temperature adjustments based on your location. It also enables firmware updates, ensuring your thermostat has the latest features and security enhancements. Download it from your app store!
Remote Control & Monitoring
Utilizing the Honeywell Home app, enjoy complete remote control over your T9 thermostat from anywhere with an internet connection. Monitor your home’s temperature in real-time and make adjustments to ensure comfort, even when you’re away.
The app provides convenient scheduling options, allowing you to create customized heating and cooling programs. Receive alerts for extreme temperatures or system malfunctions, enhancing peace of mind and potentially preventing costly issues. Stay connected and in control!
Voice Control Compatibility (Alexa, Google Assistant)
The Honeywell T9 thermostat seamlessly integrates with popular voice assistants like Amazon Alexa and Google Assistant for hands-free control. Simply use voice commands to adjust the temperature, set schedules, or inquire about current settings.
This feature adds a layer of convenience to your smart home experience, allowing for effortless adjustments without needing to access the thermostat or the Honeywell Home app. Enjoy a truly connected and responsive home climate control system!
Advanced Features & Settings
The Honeywell T9 offers insightful energy savings reports, helping you understand your heating and cooling usage patterns. These reports can identify areas for optimization, leading to reduced energy bills and a smaller carbon footprint.
Furthermore, the T9 includes customizable filter change reminders, ensuring optimal system performance and air quality. Explore advanced settings within the Honeywell Home app to fine-tune your comfort and maximize efficiency.
Energy Savings Reports
The Honeywell T9 thermostat provides detailed energy savings reports accessible through the Honeywell Home app. These reports visually demonstrate your heating and cooling consumption, broken down by day, week, or month, allowing for easy tracking.
Analyzing these reports helps identify peak usage times and potential areas for improvement. Understanding your energy habits empowers you to adjust schedules and settings, ultimately reducing energy waste and lowering monthly costs.
Filter Change Reminders
The Honeywell T9 thermostat proactively helps maintain optimal system performance with customizable filter change reminders. Through the Honeywell Home app, you can set reminders based on time or usage, ensuring timely filter replacements.
A clean filter improves air quality, boosts HVAC efficiency, and extends the lifespan of your heating and cooling system. Ignoring filter changes can lead to reduced airflow, increased energy bills, and potential system failures – this feature prevents that!